Launch Darkly: Feature control with flags!
In modern agile software development, feature management is a best practice to reduce risk and speed up code delivery. This blog will explore why and how we can use it.
Why Use a Feature Flag?
Feature flags enable us to fine-tune how we ship features and experiments. Feature flags are currently used at Shortcut to:
Gate a feature from general release without needing a long-term feature branch or blocking other development on the application. This is particularly useful when incrementally working on a larger feature, as it allows us to break down work into smaller pieces and safely merge those incremental code changes into the main code branch.
Perform A/B and multivariate experiments, which empower us to make informed decisions about what features to ship based on user behaviour.
Reduce the need for rolling back deployments when a bug is introduced. One can quickly turn off the feature flag in production instead.
Time the release of the feature with a special release event.
Target the release of a feature to specific user groups (e.g. new users in recently created organizations).
Why Use LaunchDarkly?
LaunchDarkly supports fine-tuned targeting, provides insights and debugging, and empowers backend and frontend engineers to work together by using a shared feature flag system. You can take a look at the LaunchDarkly docs to determine if this product suits your business' needs as well.
We can target specific users by using various rules where we can pass specific user details as single parameter or any json.
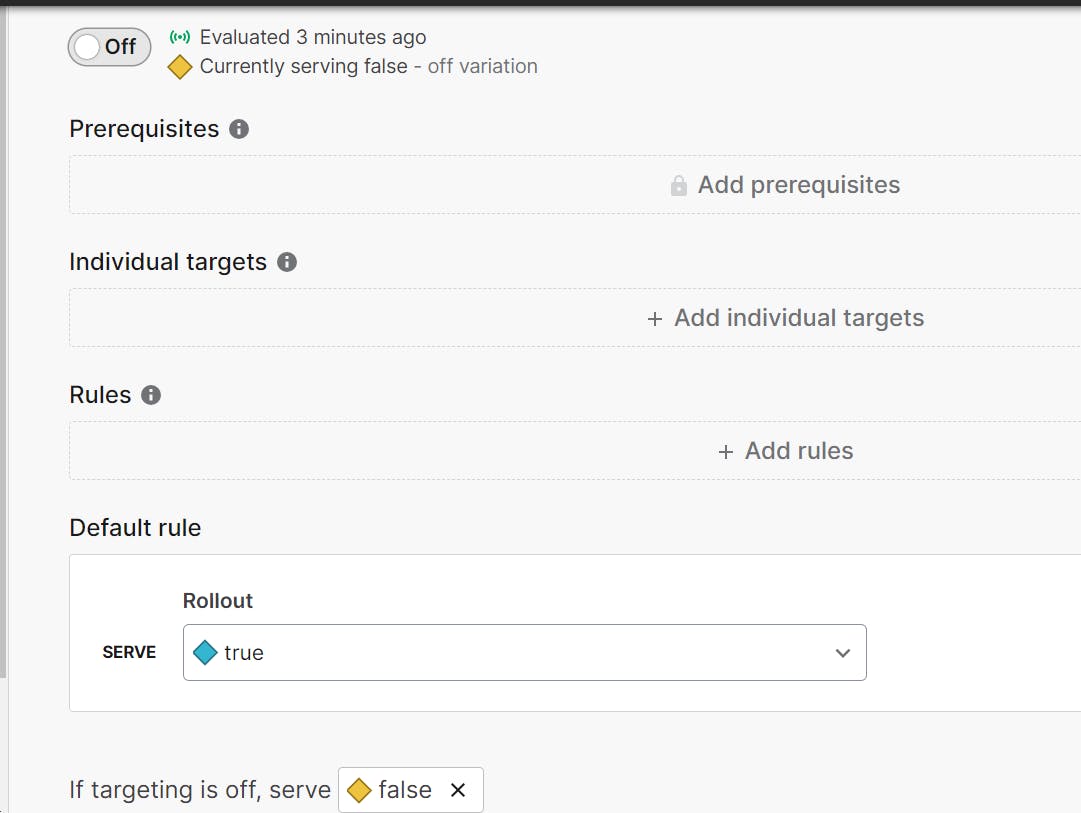
Steps for configuring flag in LaunchDarkly
Access Launch Darkly using either through marketplace (My Apps ) or using the URL (Sign in ).
Sign in with and home page should look like this:
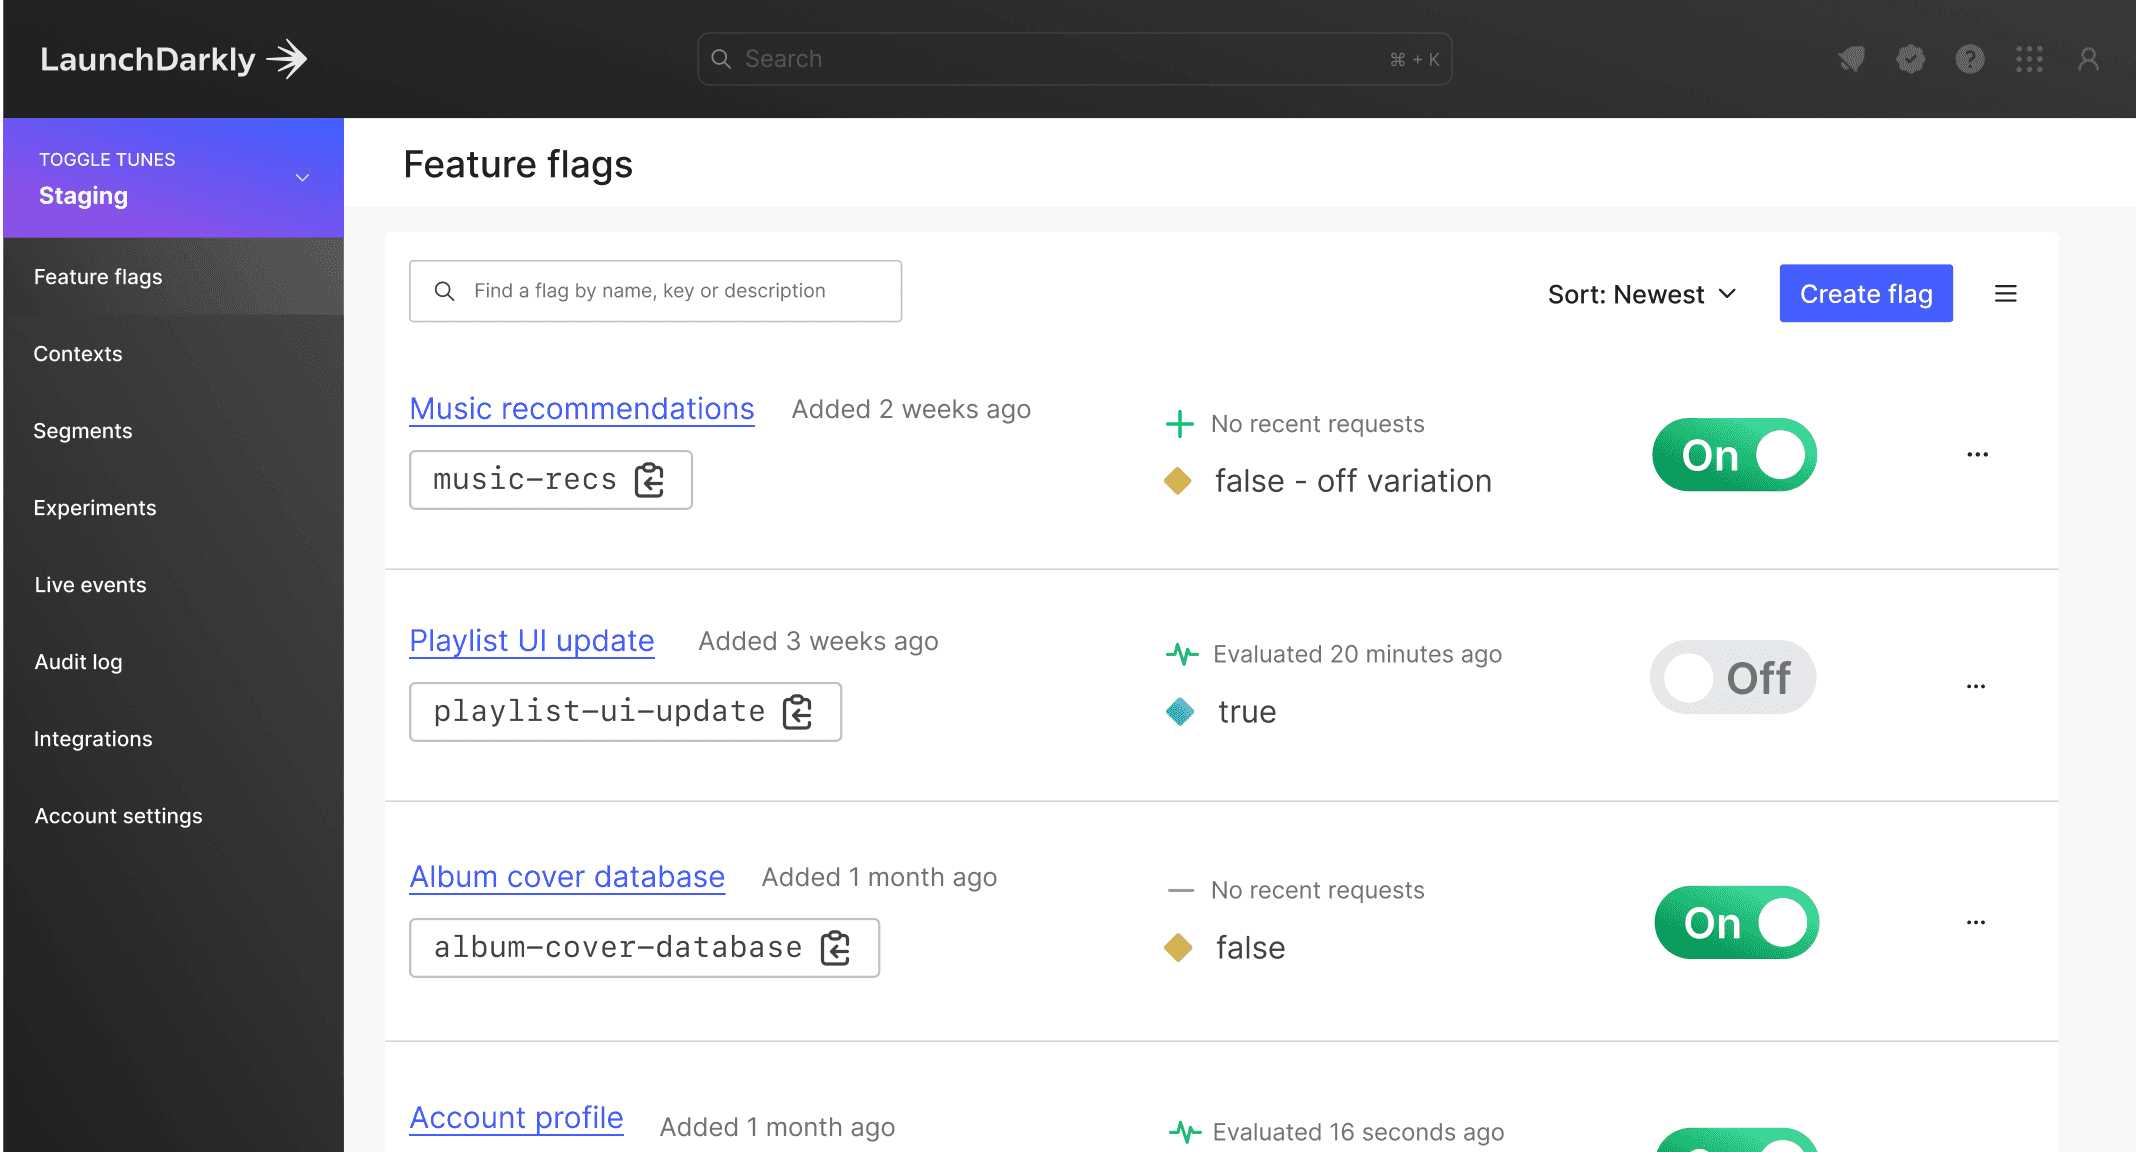
Let's create our flag!
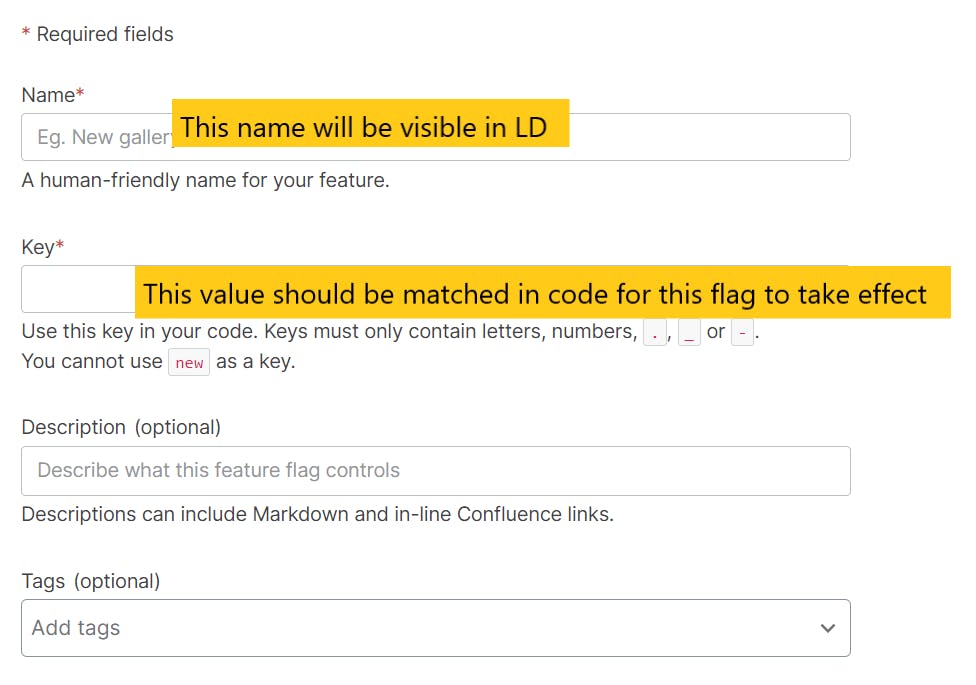
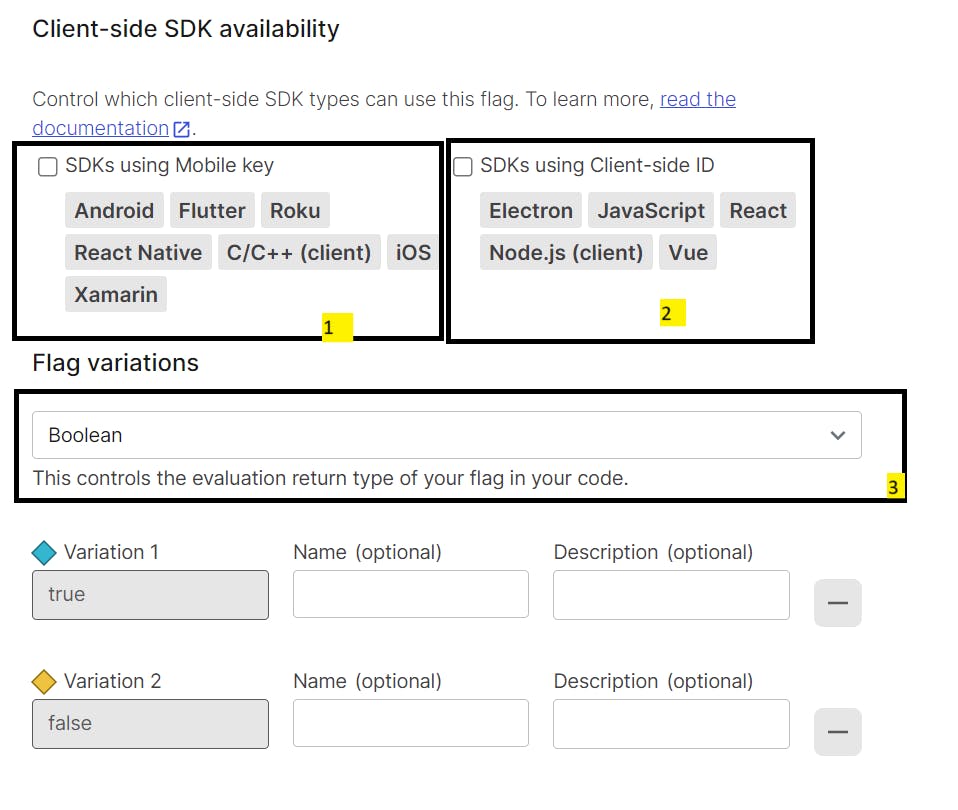
By default LaunchDarkly configures the flag for server side application only.
If we want to use this flag with any of our mobile application then we must tick this checkbox, using this LD will get to know that it needs to pass value for Mobile applications also.
If we are using desktop application then we need to enable this flag.
A flag can be of 4 types (Boolean, String, Number or Json).
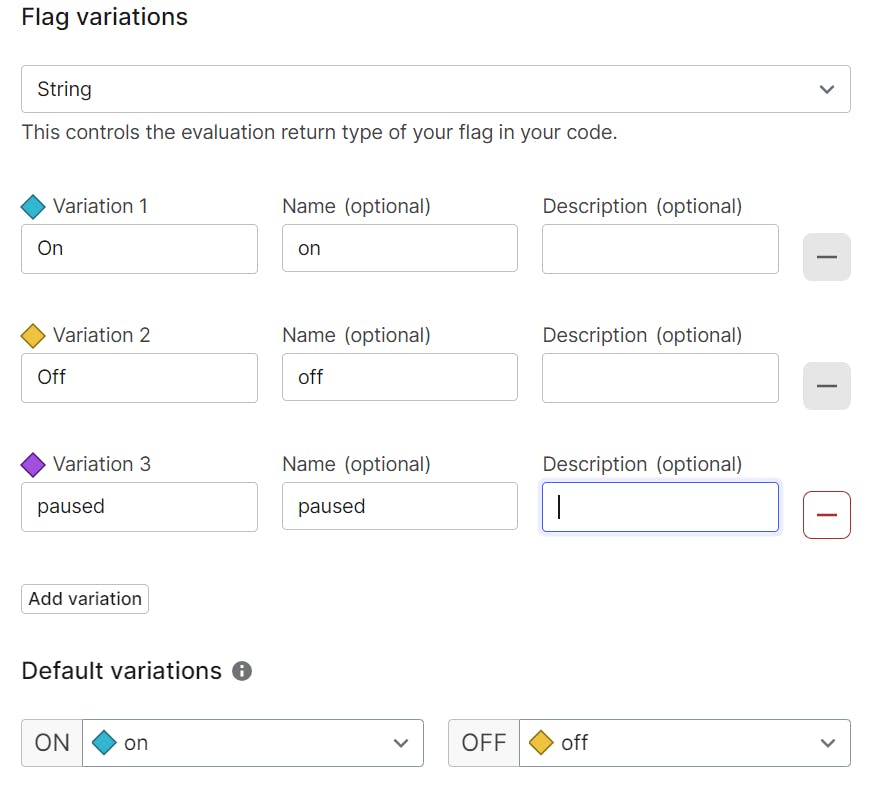
If we are using String variation, we can configure multiple variations (above is just one example). if the value matches then we can fetch the value from launch darkly.
Now, we have configured the flag and its ready to use.
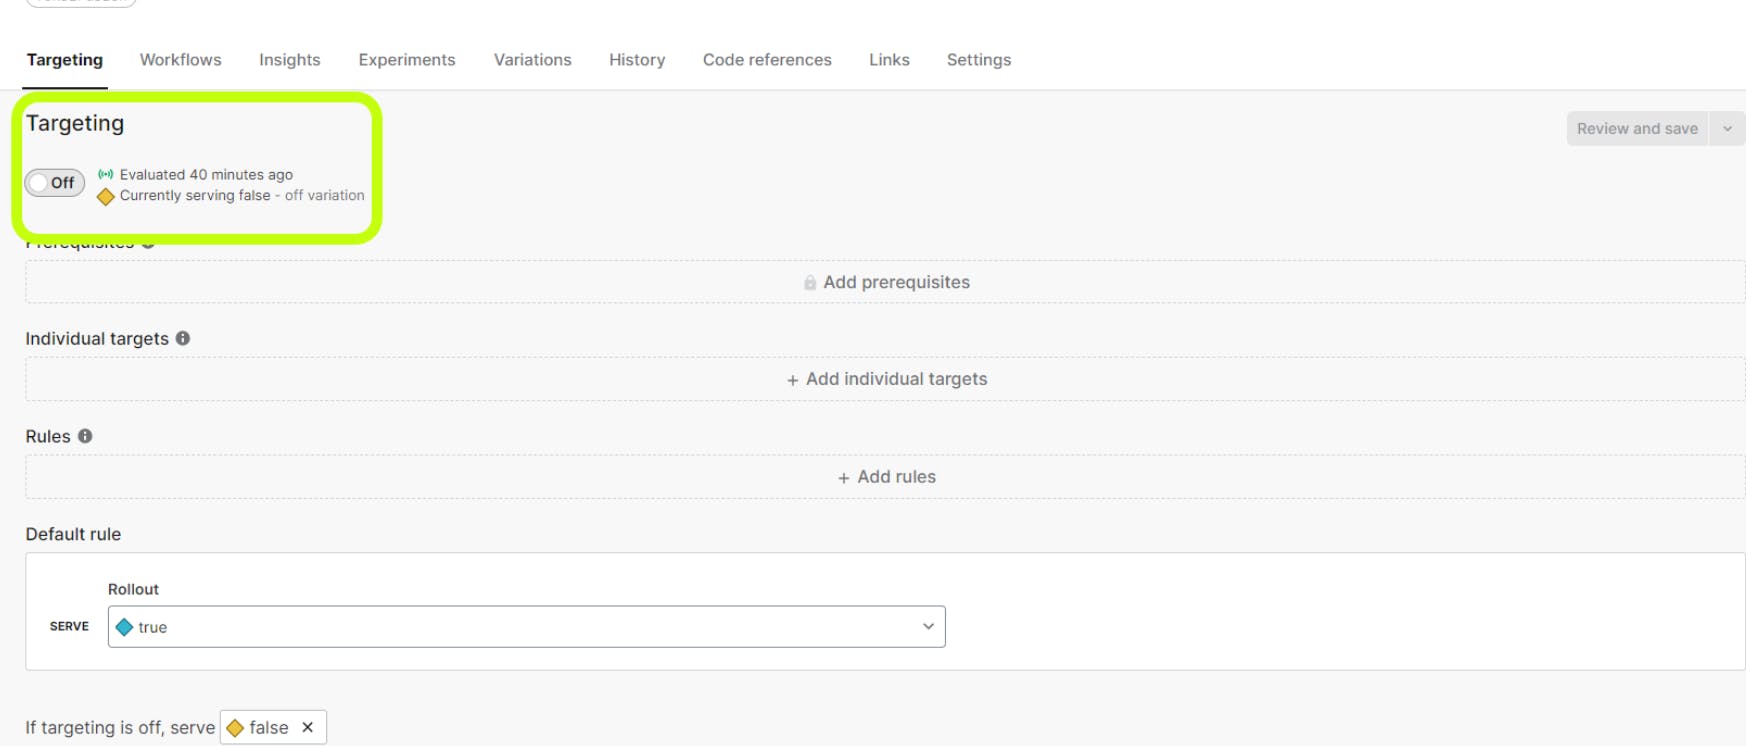
With the above highlighted box, we can use the toggle to turn it on or off.
Steps for Using flag in Java using Maven
- Add LD SDK dependency to pom.xml
<dependency>
    <groupId>com.launchdarkly</groupId>
    <artifactId>launchdarkly-java-server-sdk</artifactId>
    <version>6.3.0</version>
</dependency>
- We can create a configuration file to create beans of LDClient and User.
package com.jupiter.config;
import org.springframework.beans.factory.annotation.Value;
import org.springframework.context.annotation.Bean;
import org.springframework.context.annotation.Configuration;
import com.launchdarkly.sdk.LDUser;
import com.launchdarkly.sdk.server.LDClient;
@Configuration
public class LaunchDarklyConfig {
  @Bean
  public LDClient ldClient() {
    return new LDClient("sdk-57FAB6B-CD3E-47A2-8025-6EAE6D4BC7F9");
  }
  @Bean
  public LDUser ldUser() {
    return new LDUser.Builder("user-key").email("test@mail.com").build();
  }
}
For ease of example here, I have used test@gmail.com , but it should ideally come through a POJO which will contain the user details of currently logged in user.
- Use the flag!
@Autowired
private LDClient ldClient;

@Autowired
private LDUser ldUser;

@GetMapping("/home")
public String greetingMessage() {
    boolean isEnabled = ldClient.boolVariation("TestFlag", ldUser, false);
    if (isEnabled) {
        return "Welcome!";
    } else {
        return "Flag is turned off";
    }
}
We can further configure, User to allow this flag to be used for specific users only.
And that's a wrap!
Here's a great read and tutorial if you want to do it the React way : https://www.tothenew.com/blog/feature-flag-and-its-implementation-with-launchdarkly/